Table of Contents
Have you ever wondered why some desserts can instantly transport you to a tropical paradise with just one bite? The answer lies in the magical combination of sweet, tangy mango curd nestled in a buttery pastry shell – and this Mango Curd Tart Recipe is about to become your new obsession!
This stunning dessert is like sunshine on a plate. The bright, vibrant flavor of fresh mangoes combined with the rich, creamy texture of homemade curd creates something truly special. Whether you’re hosting a dinner party or just want to treat yourself to something extraordinary, this tart delivers on every level.
The best part? This Mango Curd Tart Recipe looks incredibly fancy but is surprisingly easy to make. With just a few simple ingredients and some basic techniques, you’ll create a dessert that rivals anything from a high-end bakery. Get ready to impress everyone who takes a bite!
What Makes This Mango Curd Tart Recipe So Special?
This Mango Curd Tart Recipe is special because it perfectly balances sweet and tart flavors while showcasing the tropical essence of fresh mangoes. The silky smooth curd filling contrasts beautifully with the crisp pastry shell, creating a dessert that’s both elegant and incredibly satisfying.
Time Requirement: 45 minutes active time, plus 3 hours chilling time Difficulty Level: Intermediate – perfect for building your baking confidence Yield: One 9-inch tart (serves 8-10 people)
What sets this recipe apart is the homemade mango curd. Unlike store-bought versions that can taste artificial, homemade mango curd bursts with real fruit flavor and has that perfect creamy texture that melts on your tongue. The pastry shell is tender and buttery, providing the perfect foundation for the luscious filling.
This tart is also incredibly versatile. It’s sophisticated enough for special occasions but simple enough to make for a weekend treat. Plus, it can be made ahead of time, making it perfect for entertaining when you want to impress without last-minute stress.
6 Reasons You’ll Love This Mango Curd Tart Recipe
1. Incredible Tropical Flavor The star of this Mango Curd Tart Recipe is the intense mango flavor that shines through in every bite. Using fresh mango puree creates a curd that tastes like pure sunshine – sweet, tangy, and absolutely delicious.
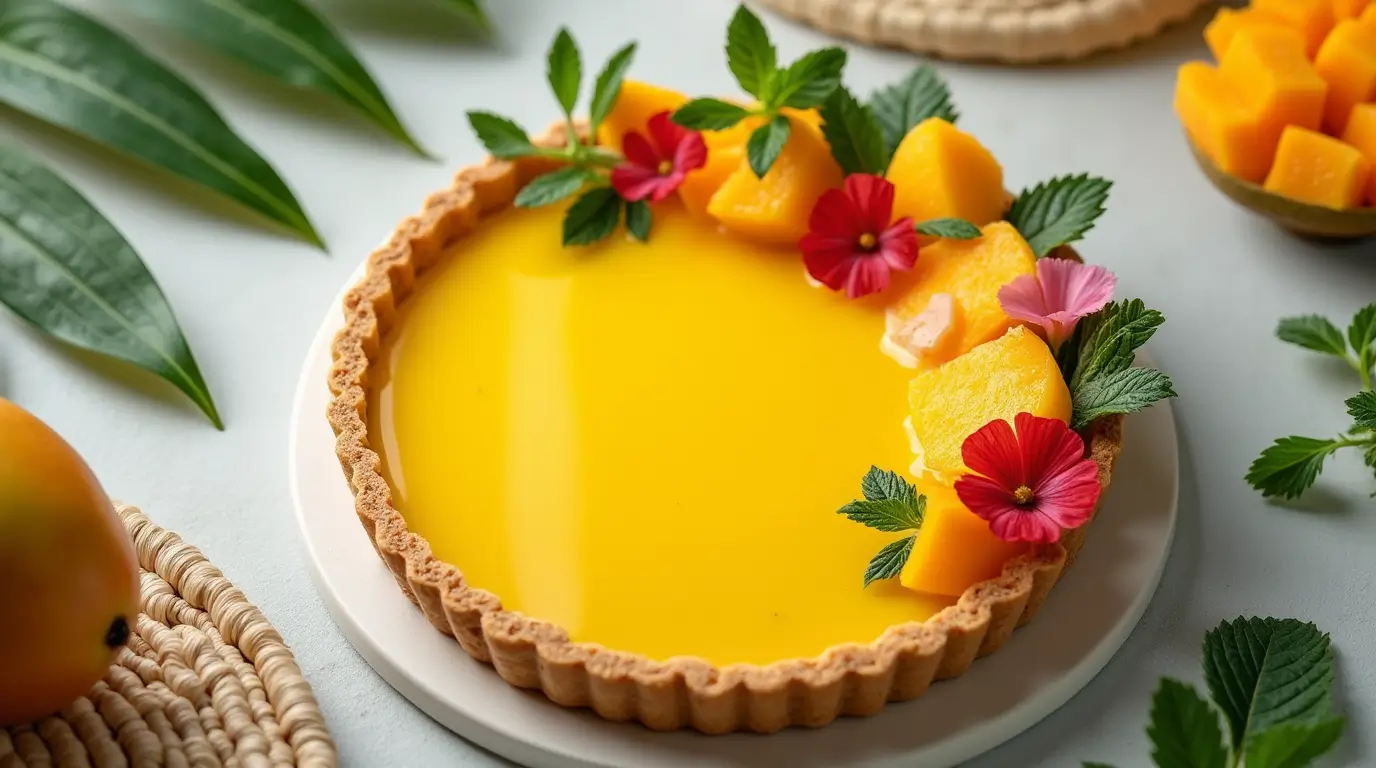
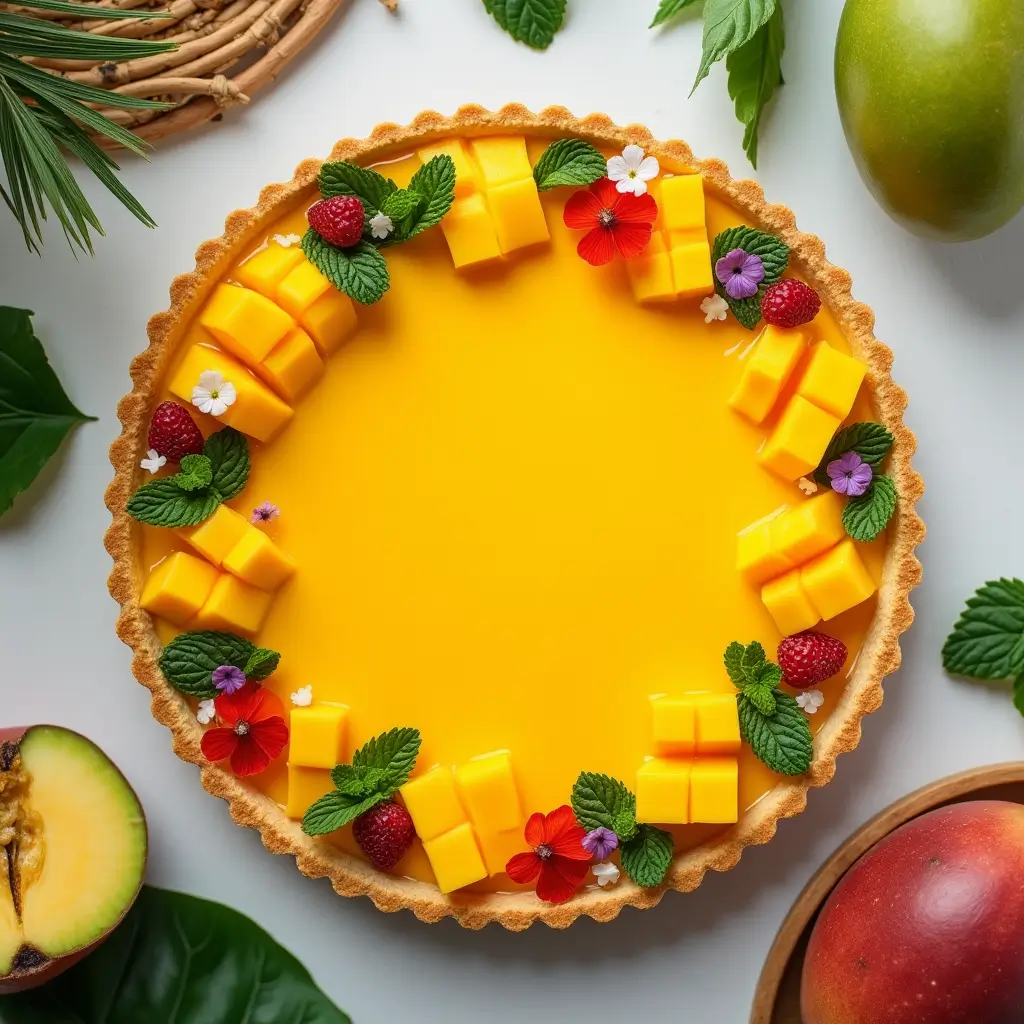
2. Stunning Visual Appeal This tart is absolutely gorgeous! The bright orange-yellow mango curd looks stunning against the golden pastry shell. It’s Instagram-worthy and will definitely wow your guests before they even take their first bite.
3. Perfect Texture Combination The contrast between the crispy, buttery tart shell and the smooth, creamy mango curd is absolutely perfect. Each bite gives you multiple textures that work together beautifully.
4. Make-Ahead Friendly This Mango Curd Tart Recipe can be made up to 2 days ahead, making it perfect for entertaining. The flavors actually get better as they meld together in the refrigerator.
5. Impressive but Achievable While this tart looks like something from a fancy bakery, it’s actually quite manageable for home bakers. The techniques are straightforward, and the results are always impressive.
6. Naturally Gluten-Free Option With a simple substitution of almond flour for regular flour in the crust, this tart can easily be made gluten-free without sacrificing any flavor or texture.
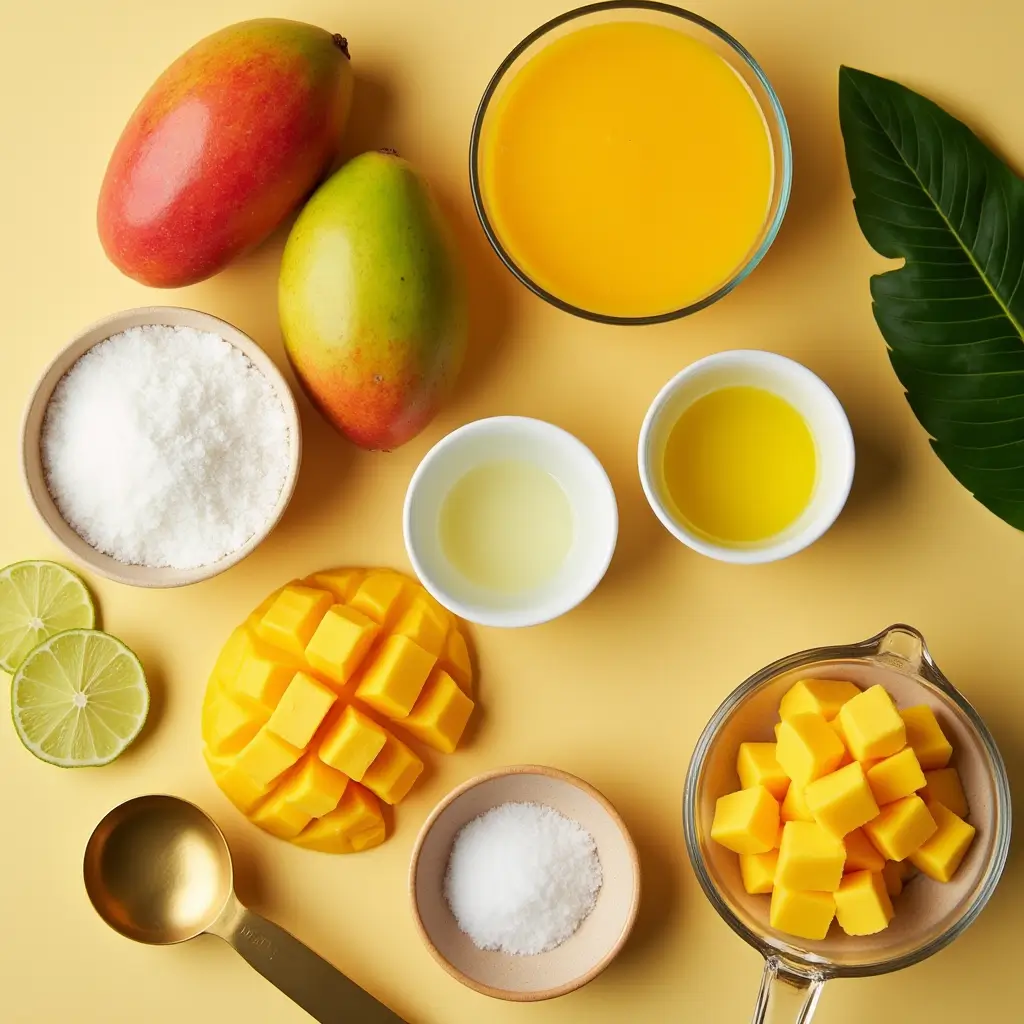
Essential Ingredients for Perfect Mango Curd Tart
The key to an amazing Mango Curd Tart Recipe is using high-quality ingredients, especially when it comes to the mangoes. Each component plays a crucial role in creating the perfect dessert.
For the Pastry Shell:
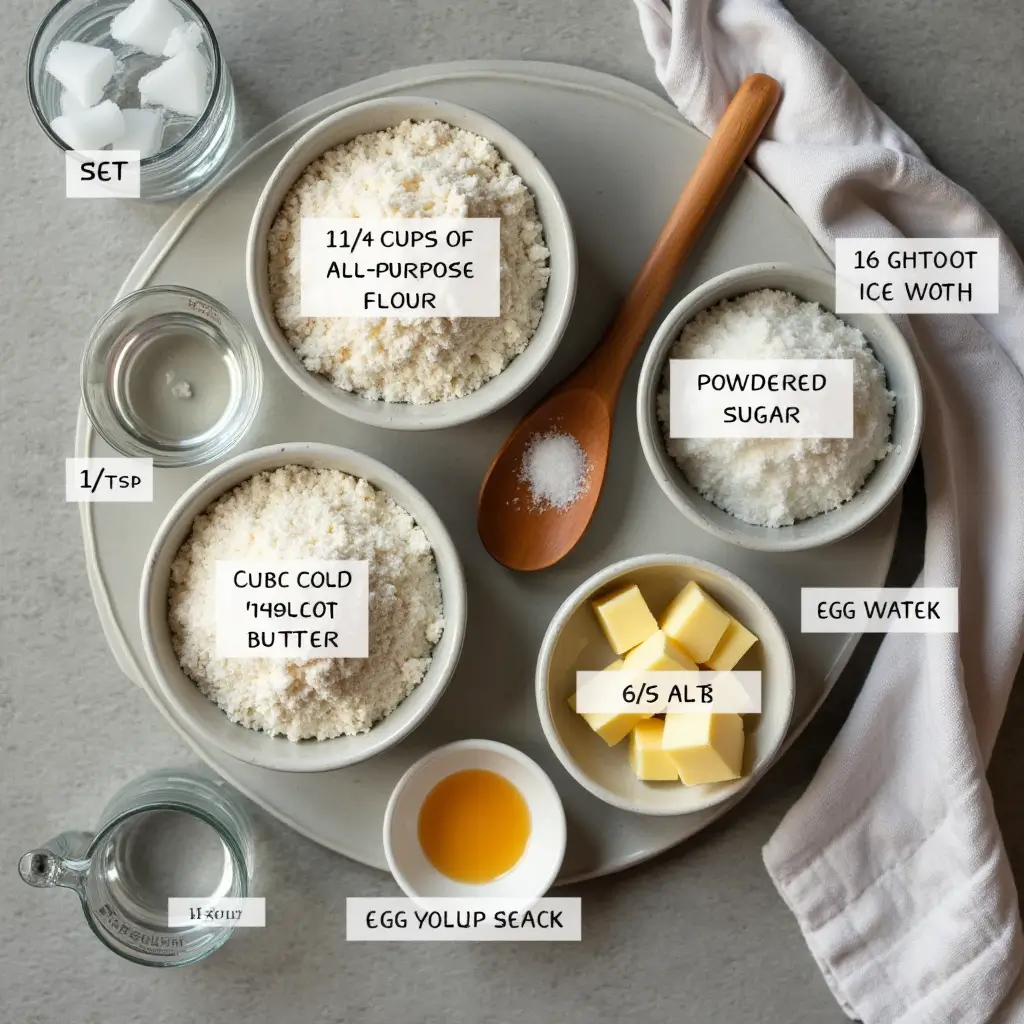
- 1¼ cups all-purpose flour
- ¼ cup powdered sugar
- ½ teaspoon salt
- ½ cup cold unsalted butter, cubed
- 1 large egg yolk
- 2-3 tablespoons ice water
For the Mango Curd:
- 2 large ripe mangoes (about 2 cups puree)
- ½ cup granulated sugar
- 3 large eggs
- 2 large egg yolks
- ¼ cup fresh lime juice
- 6 tablespoons unsalted butter, cubed
- Pinch of salt
For Garnish (optional):
- Fresh mango slices
- Toasted coconut flakes
- Mint leaves
- Lime zest
Why These Ingredients Matter:
The mangoes are absolutely crucial – they need to be perfectly ripe for the best flavor and texture. Look for mangoes that give slightly when pressed and have a sweet, fruity aroma. Unripe mangoes will make your curd taste flat and disappointing.
Cold butter in the pastry is essential for creating that flaky, tender texture. The butter creates steam pockets as it melts during baking, which gives you that perfect pastry texture.
Fresh lime juice brightens the mango flavor and adds just the right amount of tartness to balance the sweetness. Don’t skip it – it’s what makes this curd taste professional and complex.
Smart Substitutions:
- No fresh mangoes? High-quality frozen mango works too – just thaw and drain excess liquid
- Want it dairy-free? Replace butter with coconut oil (solid, not melted)
- No lime? Lemon juice works, though it will change the flavor slightly
- Gluten-free option: Replace flour with almond flour or gluten-free flour blend
- Egg substitute: Use aquafaba (chickpea liquid) for vegan version
Step-by-Step Instructions for Amazing Results
Creating this Mango Curd Tart Recipe involves two main components: the pastry shell and the mango curd. Here’s how to make both perfectly.
Step 1: Make the Pastry Shell In a food processor, pulse flour, powdered sugar, and salt together. Add cold butter cubes and pulse until mixture looks like coarse crumbs with some larger butter pieces. Add egg yolk and pulse a few times. Add ice water one tablespoon at a time until dough just comes together.
Step 2: Shape and Chill the Dough Turn dough onto plastic wrap and form into a disk. Wrap tightly and refrigerate for at least 1 hour. This rest time is crucial for easy rolling and prevents shrinkage during baking.
Step 3: Roll and Fit the Pastry On a floured surface, roll dough into a 12-inch circle. Transfer to a 9-inch tart pan with removable bottom. Press gently into corners and trim excess, leaving about ½ inch overhang. Fold overhang under and press to create a thick edge.
Step 4: Blind Bake the Shell Preheat oven to 375°F (190°C). Line pastry with parchment paper and fill with pie weights or dried beans. Bake for 15 minutes, remove weights and parchment, then bake another 10-12 minutes until golden. Cool completely.
Step 5: Prepare the Mango Puree Peel and dice your mangoes, then puree in a blender or food processor until completely smooth. Strain through a fine-mesh sieve to remove any fibers – this step is important for silky smooth curd.
Step 6: Make the Mango Curd In a heavy-bottomed saucepan, whisk together mango puree, sugar, whole eggs, egg yolks, lime juice, and salt. Cook over medium-low heat, whisking constantly, until mixture thickens and coats the back of a spoon (about 8-10 minutes). Remove from heat and whisk in butter cubes one at a time until smooth.
Building Your Perfect Mango Curd Tart
The assembly of your Mango Curd Tart Recipe is where everything comes together to create that stunning final product.
Assembling the Tart: Strain the warm mango curd through a fine-mesh sieve directly into the cooled tart shell. This removes any lumps and ensures a perfectly smooth filling. Use a spatula to spread the curd evenly, being careful not to create air bubbles.
Achieving the Perfect Finish: Gently tap the tart pan on the counter a few times to release any air bubbles. Use a knife tip to pop any bubbles that rise to the surface. The surface should be completely smooth and even.
Chilling for Success: Cover the tart with plastic wrap, pressing it directly onto the surface of the curd to prevent a skin from forming. Refrigerate for at least 3 hours or overnight. This chilling time is essential for the curd to set properly.
Presentation Tips: Just before serving, remove the tart from the refrigerator and carefully remove the outer ring of the tart pan. For extra elegance, arrange thin mango slices in an overlapping pattern on top, or sprinkle with toasted coconut and fresh lime zest. A few mint leaves add a beautiful color contrast.
Storage and Make-Ahead Tips
One of the best things about this Mango Curd Tart Recipe is how well it keeps and how perfectly it works for make-ahead entertaining.
Storage Guidelines: Store the finished tart covered in the refrigerator for up to 3 days. The pastry stays crisp and the curd maintains its perfect texture. Don’t freeze the completed tart as the curd texture will change.
Make-Ahead Options: The pastry shell can be baked up to 2 days ahead and stored at room temperature in an airtight container. The mango curd can be made up to 3 days ahead and stored in the refrigerator with plastic wrap pressed directly on the surface.
For ultimate convenience, assemble the entire tart up to 2 days before serving. The flavors actually improve as they meld together, making this an ideal dessert for entertaining.
Component Storage: Unbaked pastry dough can be wrapped and frozen for up to 3 months. Thaw overnight in the refrigerator before rolling. Mango curd can be frozen for up to 1 month – thaw in the refrigerator and whisk smooth before using.
Serving Tips: Remove the tart from the refrigerator 15-20 minutes before serving to take the chill off. Use a sharp knife dipped in warm water and wiped clean between cuts for the cleanest slices.
Creative Recipe Variations
Once you master the basic Mango Curd Tart Recipe, try these delicious variations to keep things exciting.
Mango-Passion Fruit Tart: Replace ¼ cup of the mango puree with passion fruit pulp for a more complex tropical flavor that’s absolutely divine.
Coconut Mango Tart: Add 2 tablespoons of coconut cream to the curd and use a coconut shortbread crust made with shredded coconut mixed into the pastry.
Spiced Mango Tart: Add a pinch of cardamom and ginger to the curd for a warm, exotic flavor that pairs beautifully with the mango.
Mango-Lime Tart: Increase the lime juice to ⅓ cup and add lime zest for a more citrus-forward flavor that’s bright and refreshing.
Mini Mango Tarts: Make individual tartlets using a mini muffin pan – perfect for parties and portion control.
Chocolate Mango Tart: Use a chocolate pastry shell and drizzle the finished tart with melted dark chocolate for an indulgent twist.
Mango Mascarpone Tart: Fold ½ cup of mascarpone cheese into the cooled curd for an extra rich and creamy texture.
Troubleshooting Common Issues
Even with a great Mango Curd Tart Recipe, sometimes things don’t go perfectly. Here are solutions for common problems:
Curd won’t thicken: Make sure you’re cooking over medium-low heat and whisking constantly. It can take up to 15 minutes to thicken properly.
Lumpy curd: Always strain the finished curd through a fine-mesh sieve to remove any lumps from cooked egg bits.
Pastry shrinks during baking: Make sure to chill the dough properly and don’t stretch it when fitting into the pan.
Soggy bottom: Blind bake the shell completely before adding the filling, and make sure it’s completely cool before adding the curd.
Curd has a skin: Always press plastic wrap directly onto the surface of the curd to prevent a skin from forming.
Conclusion
This Mango Curd Tart Recipe is truly something special – it combines the tropical sweetness of mangoes with classic pastry techniques to create a dessert that’s both impressive and achievable. Whether you’re making it for a special occasion or just because you want to treat yourself to something wonderful, this tart delivers on every level.
Don’t be intimidated by making curd from scratch – it’s actually quite simple once you understand the technique. The key is patience and gentle heat. Take your time, follow the steps, and you’ll be rewarded with a dessert that tastes like it came from a professional pastry kitchen.
Remember, baking is about joy and creativity as much as it is about following recipes. Feel free to experiment with the variations or create your own unique twist. Maybe you’ll discover that a touch of vanilla or a sprinkle of toasted nuts makes it even more special for your family.
So gather your mangoes, roll up your sleeves, and get ready to create something truly beautiful and delicious. Your friends and family are going to be amazed by your baking skills, and you’ll have the satisfaction of knowing you created this gorgeous dessert with your own hands. Happy baking!
Did you love it ? Let us know!
There are no reviews yet. Be the first one to write one.